This is part 9 of a multipart series showing you how to get started with the MetaWear platform. View the contents of the series to easily skip forwards or backwards
One of the reasons why using the MetaWear sample Android app is a big jump for those new to Android is that it involves multiple activities and especially because it uses fragments which build upon other fragments. This can make some parts of it seem like a black box without some serious digging. In this section, I’ll unpack some of the more basic parts of the sample app. As a result, there will be a slight jump in complexity…But if you’ve made it this far, you’re probably ready.
We are going to add the Sample app’s ScannerActivity.java to our project. This will allow us to select from multiple different boards, and eventually to manage our bluetooth connections more effectively.
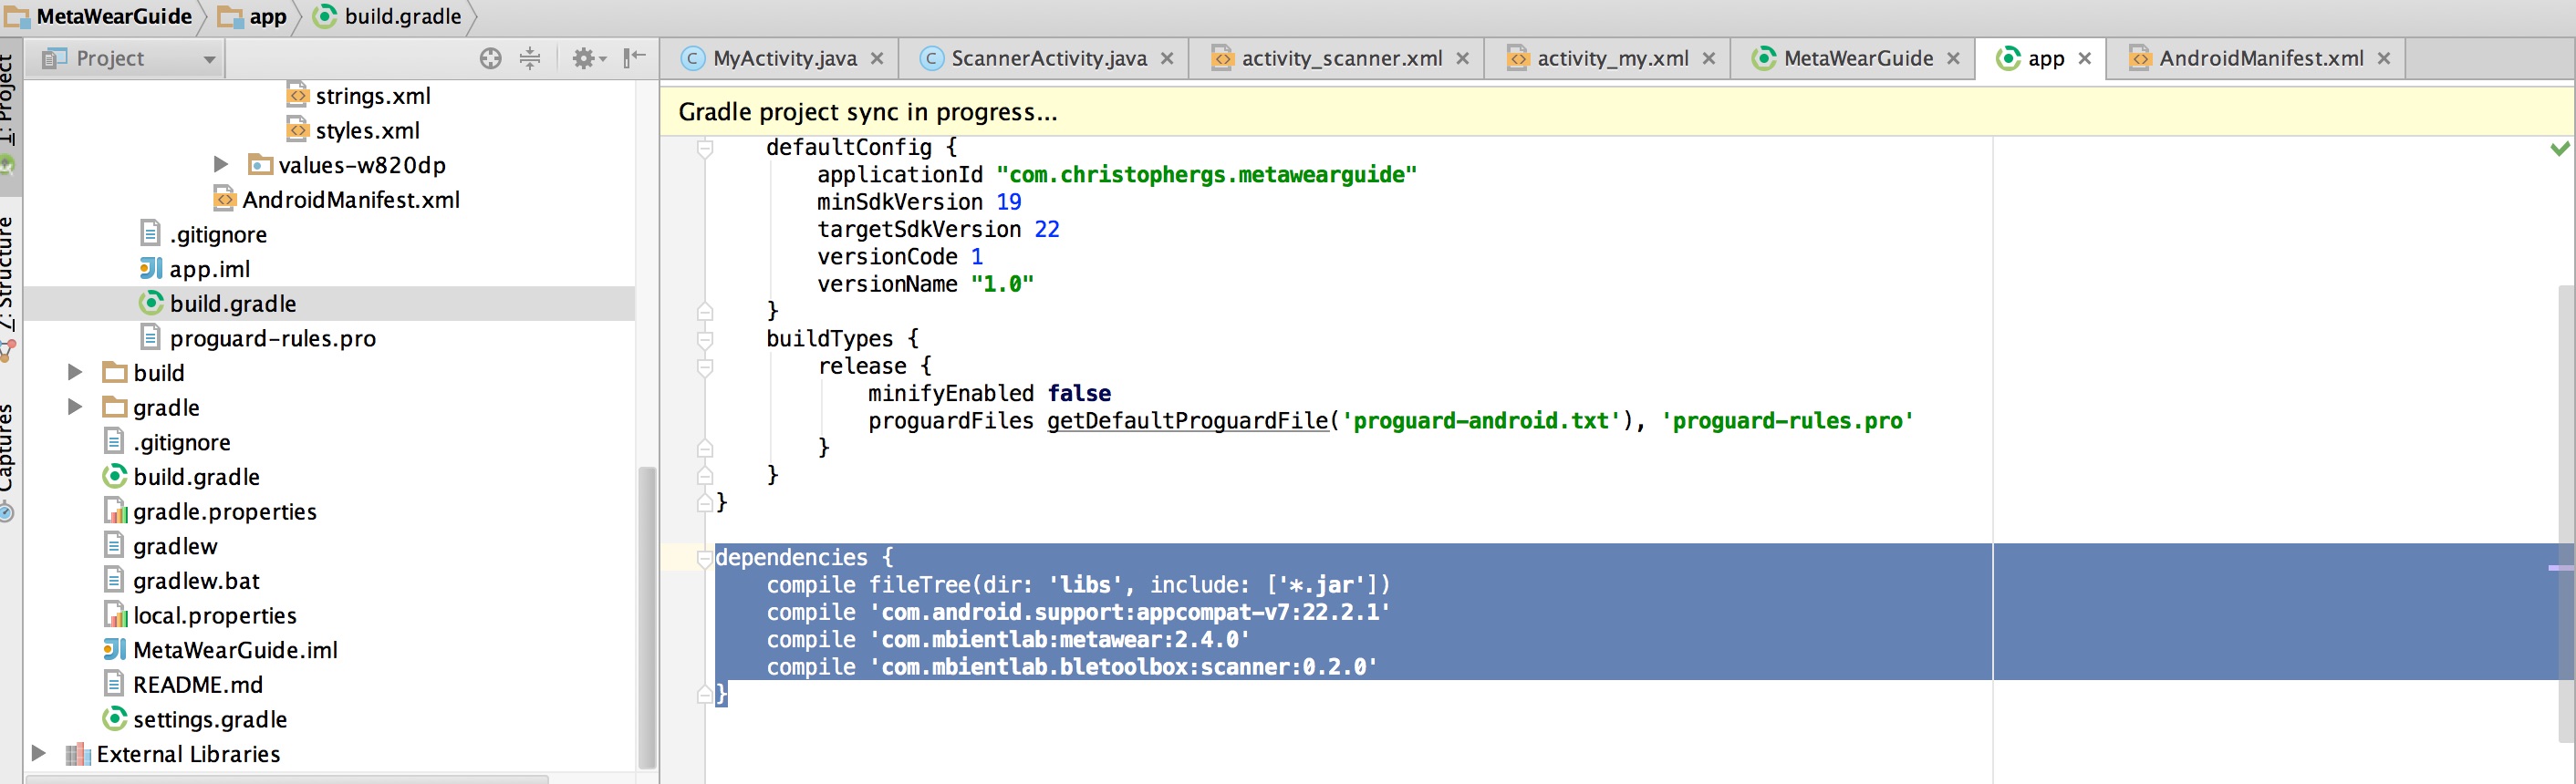
To begin, we need to add a new dependency to our app build.grade file:
dependencies {
    compile fileTree(dir: 'libs', include: ['*.jar'])
    compile 'com.mbientlab:metawear:2.4.0'
    compile 'com.mbientlab.bletoolbox:scanner:0.2.0' //add this
Be sure to sync the project after adding the new dependency.
Next, create the new activity. In Android Studio, go to File –> New –> Activity –> Blank Activity
Call the activity, ScannerActivity. The associated layout name will automatically update.
We add the ScannerActivity to our AndroidManifest.xml
<activity
    android:name=".MyActivity"
    android:label="@string/app_name" >
    <intent-filter>
        <action android:name="android.intent.action.MAIN" />
    </intent-filter>
</activity>
<activity
    android:name=".ScannerActivity"
    android:label="@string/title_activity_scanner" >
    <intent-filter>
        <action android:name="android.intent.action.MAIN" />
        <category android:name="android.intent.category.LAUNCHER" />
    </intent-filter>
</activity>
Note that scanner activity is now the LAUNCHER activity, and that we have removed that action from .MyActivity. If you run your app you should see the ‘Hello World’ message.
Let’s update our activty_scanner.xml layout file. The ScannerActivity will require the ids we update here:
<LinearLayout xmlns:android="http://schemas.android.com/apk/res/android"
    android:id="@+id/scanner_fragment_layout"
    android:orientation="vertical"
    android:layout_width="match_parent"
    android:layout_height="match_parent">

    <TextView
        android:layout_width="wrap_content"
        android:layout_height="wrap_content"
        android:textAppearance="?android:attr/textAppearanceLarge"
        android:text="Select Device"
        android:id="@+id/ble_scan_title"
        android:layout_gravity="center_horizontal" />

    <fragment xmlns:tools="http://schemas.android.com/tools" android:id="@+id/scanner_fragment"
        android:name="com.mbientlab.bletoolbox.scanner.BleScannerFragment"
        tools:layout="@layout/blescan_device_list" android:layout_width="match_parent"
        android:layout_height="match_parent" />

</LinearLayout>
You’ll note (and Android Studio will tell you) that a few strings need adding. Add these to your strings.xml file:
<string name="title_connecting">Connecting...</string>
<string name="message_wait">Please wait</string>
<string name="label_cancel">Cancel</string>
OK, now we’re ready to get to work on the ScannerActivity.
By checking against the branch version-0.8, make sure you’ve got all the imports required (there are quite a few).
We will be implementing both a ServiceConnection and a ScannerCommunicationBus in our activity, so the syntax is as follows:
public class ScannerActivity extends AppCompatActivity implements ScannerCommunicationBus, ServiceConnection {
	//activity code

}
Both of these have certain required methods. From part 3 You should already be familiar with those required for the ServiceConnection:
@Override
public void onServiceConnected(ComponentName componentName, IBinder iBinder) {
    serviceBinder = (MetaWearBleService.LocalBinder) iBinder;
}

@Override
public void onServiceDisconnected(ComponentName componentName) {

}
And there are a few standard activity setup methods to complete also:
@Override
protected void onCreate(Bundle savedInstanceState) {
    super.onCreate(savedInstanceState);
    setContentView(R.layout.activity_scanner);

    getApplicationContext().bindService(new Intent(this, MetaWearBleService.class), this, BIND_AUTO_CREATE);
}

@Override
public void onDestroy() {
    super.onDestroy();

    ///< Unbind the service when the activity is destroyed
    getApplicationContext().unbindService(this);
}
Now we need to implement the methods for ScannerCommunicationBus. First, we’ll need a few variables (including our TAG variable for logging):
private static final String TAG = "MetaWear";
private final static UUID[] serviceUuids;
private MetaWearBleService.LocalBinder serviceBinder;
public static final int REQUEST_START_APP= 1;
private MetaWearBoard mwBoard;
static {
    serviceUuids= new UUID[] {
            MetaWearBoard.METAWEAR_SERVICE_UUID,
            MetaWearBoard.METABOOT_SERVICE_UUID
    };
}
And then the methods themselves:
@Override
    protected void onActivityResult(int requestCode, int resultCode, Intent data) {
        switch(requestCode) {
            case REQUEST_START_APP:
                ((BleScannerFragment) getFragmentManager().findFragmentById(R.id.scanner_fragment)).startBleScan();
                break;
        }
        super.onActivityResult(requestCode, resultCode, data);
    }

    @Override
    public UUID[] getFilterServiceUuids() {
        return serviceUuids;
    }

    @Override
    public long getScanDuration() {
        return 10000L;
    }

    @Override
    public void onDeviceSelected(BluetoothDevice bluetoothDevice) {
        Log.i(TAG, "Device selected");
    }
At this point, we have a basic structure. If you run the app, you will see the scanner activity with a scan button, but nothing will happen when you press the button. Let’s add more code:
@Override
public void onDeviceSelected(final BluetoothDevice btDevice) {
mwBoard= serviceBinder.getMetaWearBoard(btDevice);
final ProgressDialog connectDialog = new ProgressDialog(this);
connectDialog.setTitle(getString(R.string.title_connecting));
connectDialog.setMessage(getString(R.string.message_wait));
connectDialog.setCancelable(false);
connectDialog.setCanceledOnTouchOutside(false);
connectDialog.setIndeterminate(true);
connectDialog.setButton(DialogInterface.BUTTON_NEGATIVE, getString(R.string.label_cancel), new DialogInterface.OnClickListener() {
@Override
public void onClick(DialogInterface dialogInterface, int i) {
mwBoard.disconnect();
}
});
connectDialog.show();
mwBoard.setConnectionStateHandler(new MetaWearBoard.ConnectionStateHandler() {
@Override
public void connected() {
connectDialog.dismiss();
Log.i(TAG, String.format("Accelerometer: %s", mwBoard.getMacAddress()));
}
@Override
public void disconnected() {
mwBoard.connect();
}
@Override
public void failure(int status, Throwable error) {
mwBoard.connect();
}
});
mwBoard.connect();
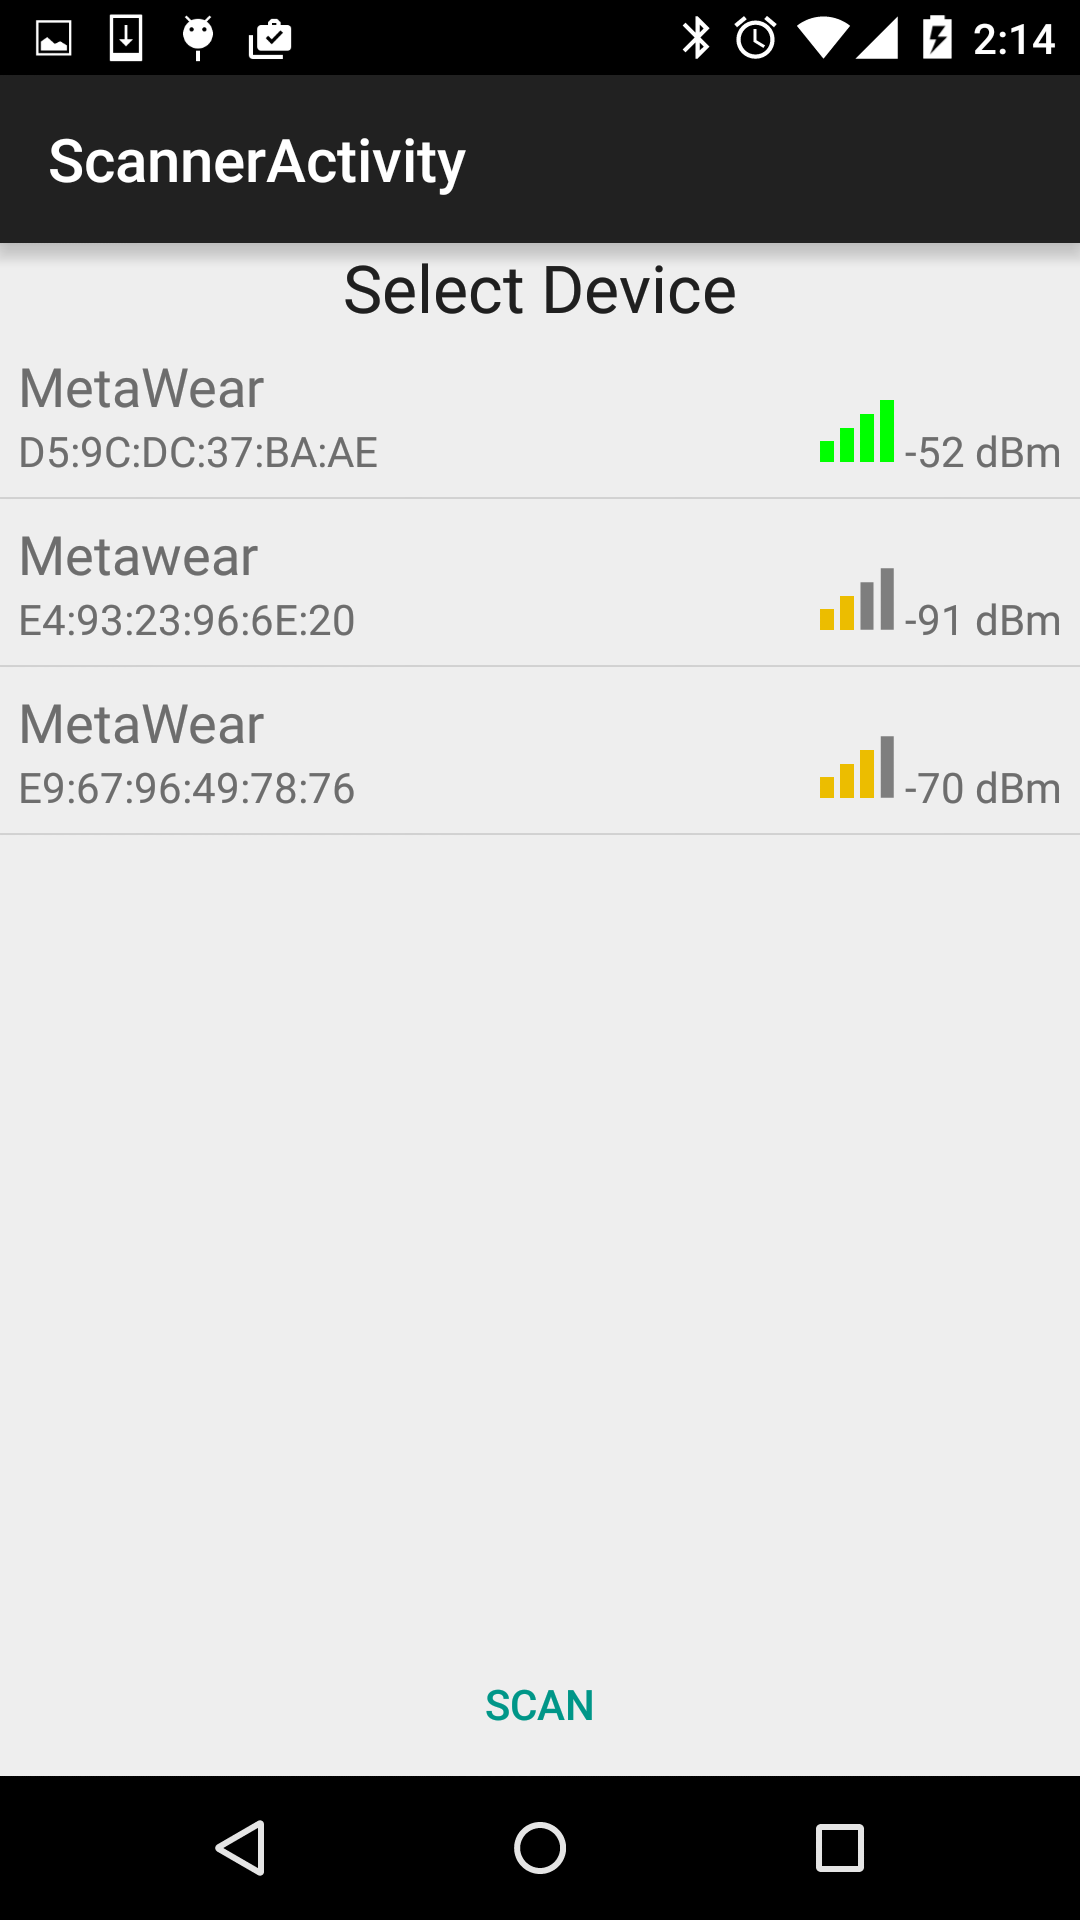
}We now have enough code to search for the boards over bluetooth without manually entering the MAC address. If you run the app and hit “Scan”, then a list of the MetaWear boards within range will be displayed:
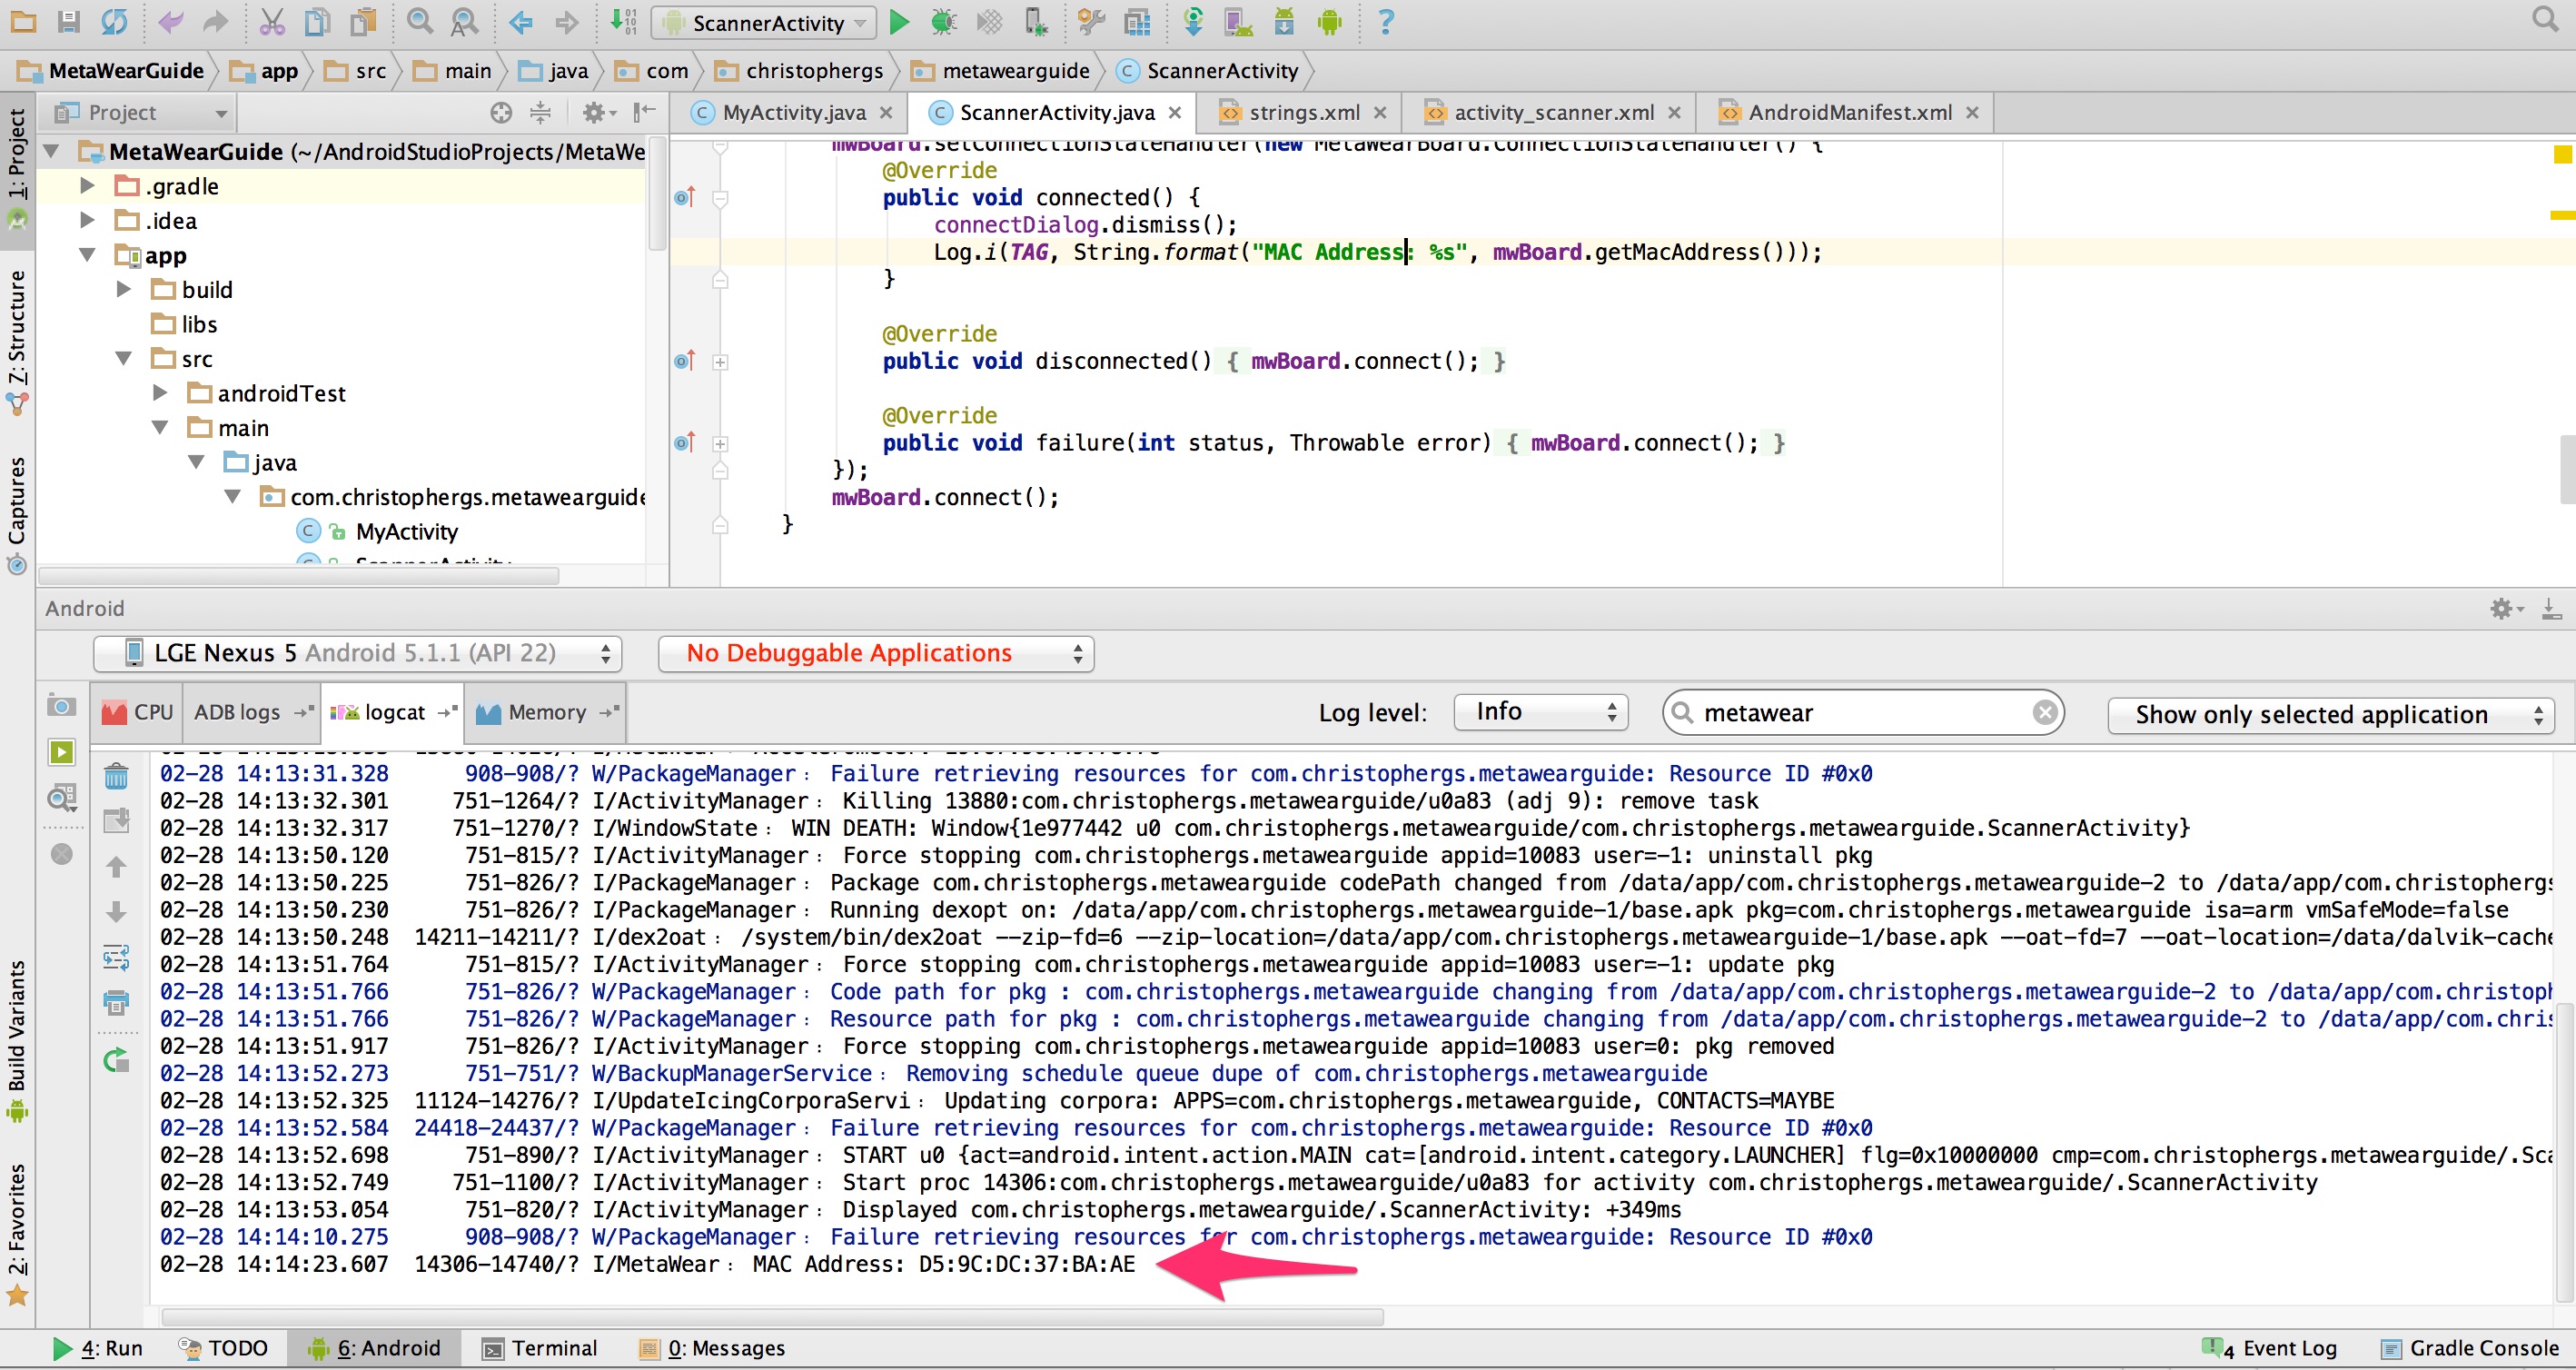
The line of code in our log above mwBoard.getMacAddress() also ensures that when you select a board, its MAC address is displayed in the log:
Since this post is already quite long, I’ll break it into two sections. In section II, I will show you the next steps after selecting a board using our new ScannerActivity.
Note You can view all these changes in the github repository on the branch version-0.8